
AionUi - Free, Open-Source Desktop Office Agent
AionUi setup guide — free, open-source desktop office agent supporting Gemini CLI, Claude Code, Codex, and more. Connect to Nova Router for multi-model AI workflows.
🚀 AionUi is a free, local, open-source Cowork that supports multiple AI agents such as Gemini CLI, Claude Code, Codex, OpenCode, Qwen Code, Goose CLI, Auggie, and more. It provides a complete GUI interface and WebUI remote access functionality, serving as an open-source alternative to Cowork.
- Official Website: https://www.aionui.com
- GitHub Repository: https://github.com/iOfficeAI/AionUi
- Download Address: https://github.com/iOfficeAI/AionUi/releases
Core Features
💬 Multi-Session Chat
- Multi-Session + Independent Context - Open multiple chat sessions simultaneously, each session has independent context memory
- Local Storage - All conversation data is saved in a local SQLite database and will not be lost
🤖 Multi-Model Support
- Multi-Platform Support - Supports mainstream models like Gemini, OpenAI, Claude, Qwen, flexible switching
- Local Model Support - Supports local model deployment like Ollama, LM Studio
🤝 Multi-Agent Mode
- Run Multiple AI Agents Simultaneously - Can run multiple AI agents simultaneously (such as Gemini CLI, Claude Code, Codex, OpenCode, Qwen Code, Goose CLI, Auggie, etc.)
- MCP Unified Management - Unified management and configuration of all agents through Model Context Protocol (MCP), simplifying operations
- Skills Configuration - Support configuring dedicated Skills for different agents to extend agent capabilities
- Assistant Customization - Support custom assistant configuration to create personalized AI workflows
- Independent Configuration - Each agent can be configured and used independently without interference
- Flexible Switching - Flexibly switch between different agents to meet various scenario needs
🗂️ File Management
- File Tree Browsing + Drag & Drop Upload - Browse files like folders, support drag and drop files or folders for one-click import
- Smart Organization - Let AI help organize folders with automatic classification
📄 Preview Panel
- 9+ Format Preview - Supports PDF, Word, Excel, PPT, code, Markdown, images, and other formats
- Real-time Tracking + Editable - Automatically tracks file changes, supports real-time editing and debugging of Markdown, code, HTML
🎨 AI Image Generation & Editing
- Intelligent Image Generation - Supports multiple image generation models like Gemini 2.5 Flash Image Preview, Nano, Banana
- Image Recognition & Editing - AI-driven image analysis and editing features
🌐 Multi-Channel Access
- WebUI Remote Access - Access from any device on the network via browser, supports mobile devices
- Telegram Integration - Support interaction through Telegram bot
- Feishu Integration - Support access and interaction through Feishu
- Local Data Security - All data stored in local SQLite database, suitable for server deployment
Nova Router Configuration Steps
| Field | What to enter |
|---|---|
| Provider Type | Choose the provider type that corresponds to Nova Router |
| API Key | Use the API key generated in the Nova Router console |
| API Address | Enter your Nova Router endpoint, for example https://<your-service-domain>/v1 |
-
Copy the API key from Nova Router
-
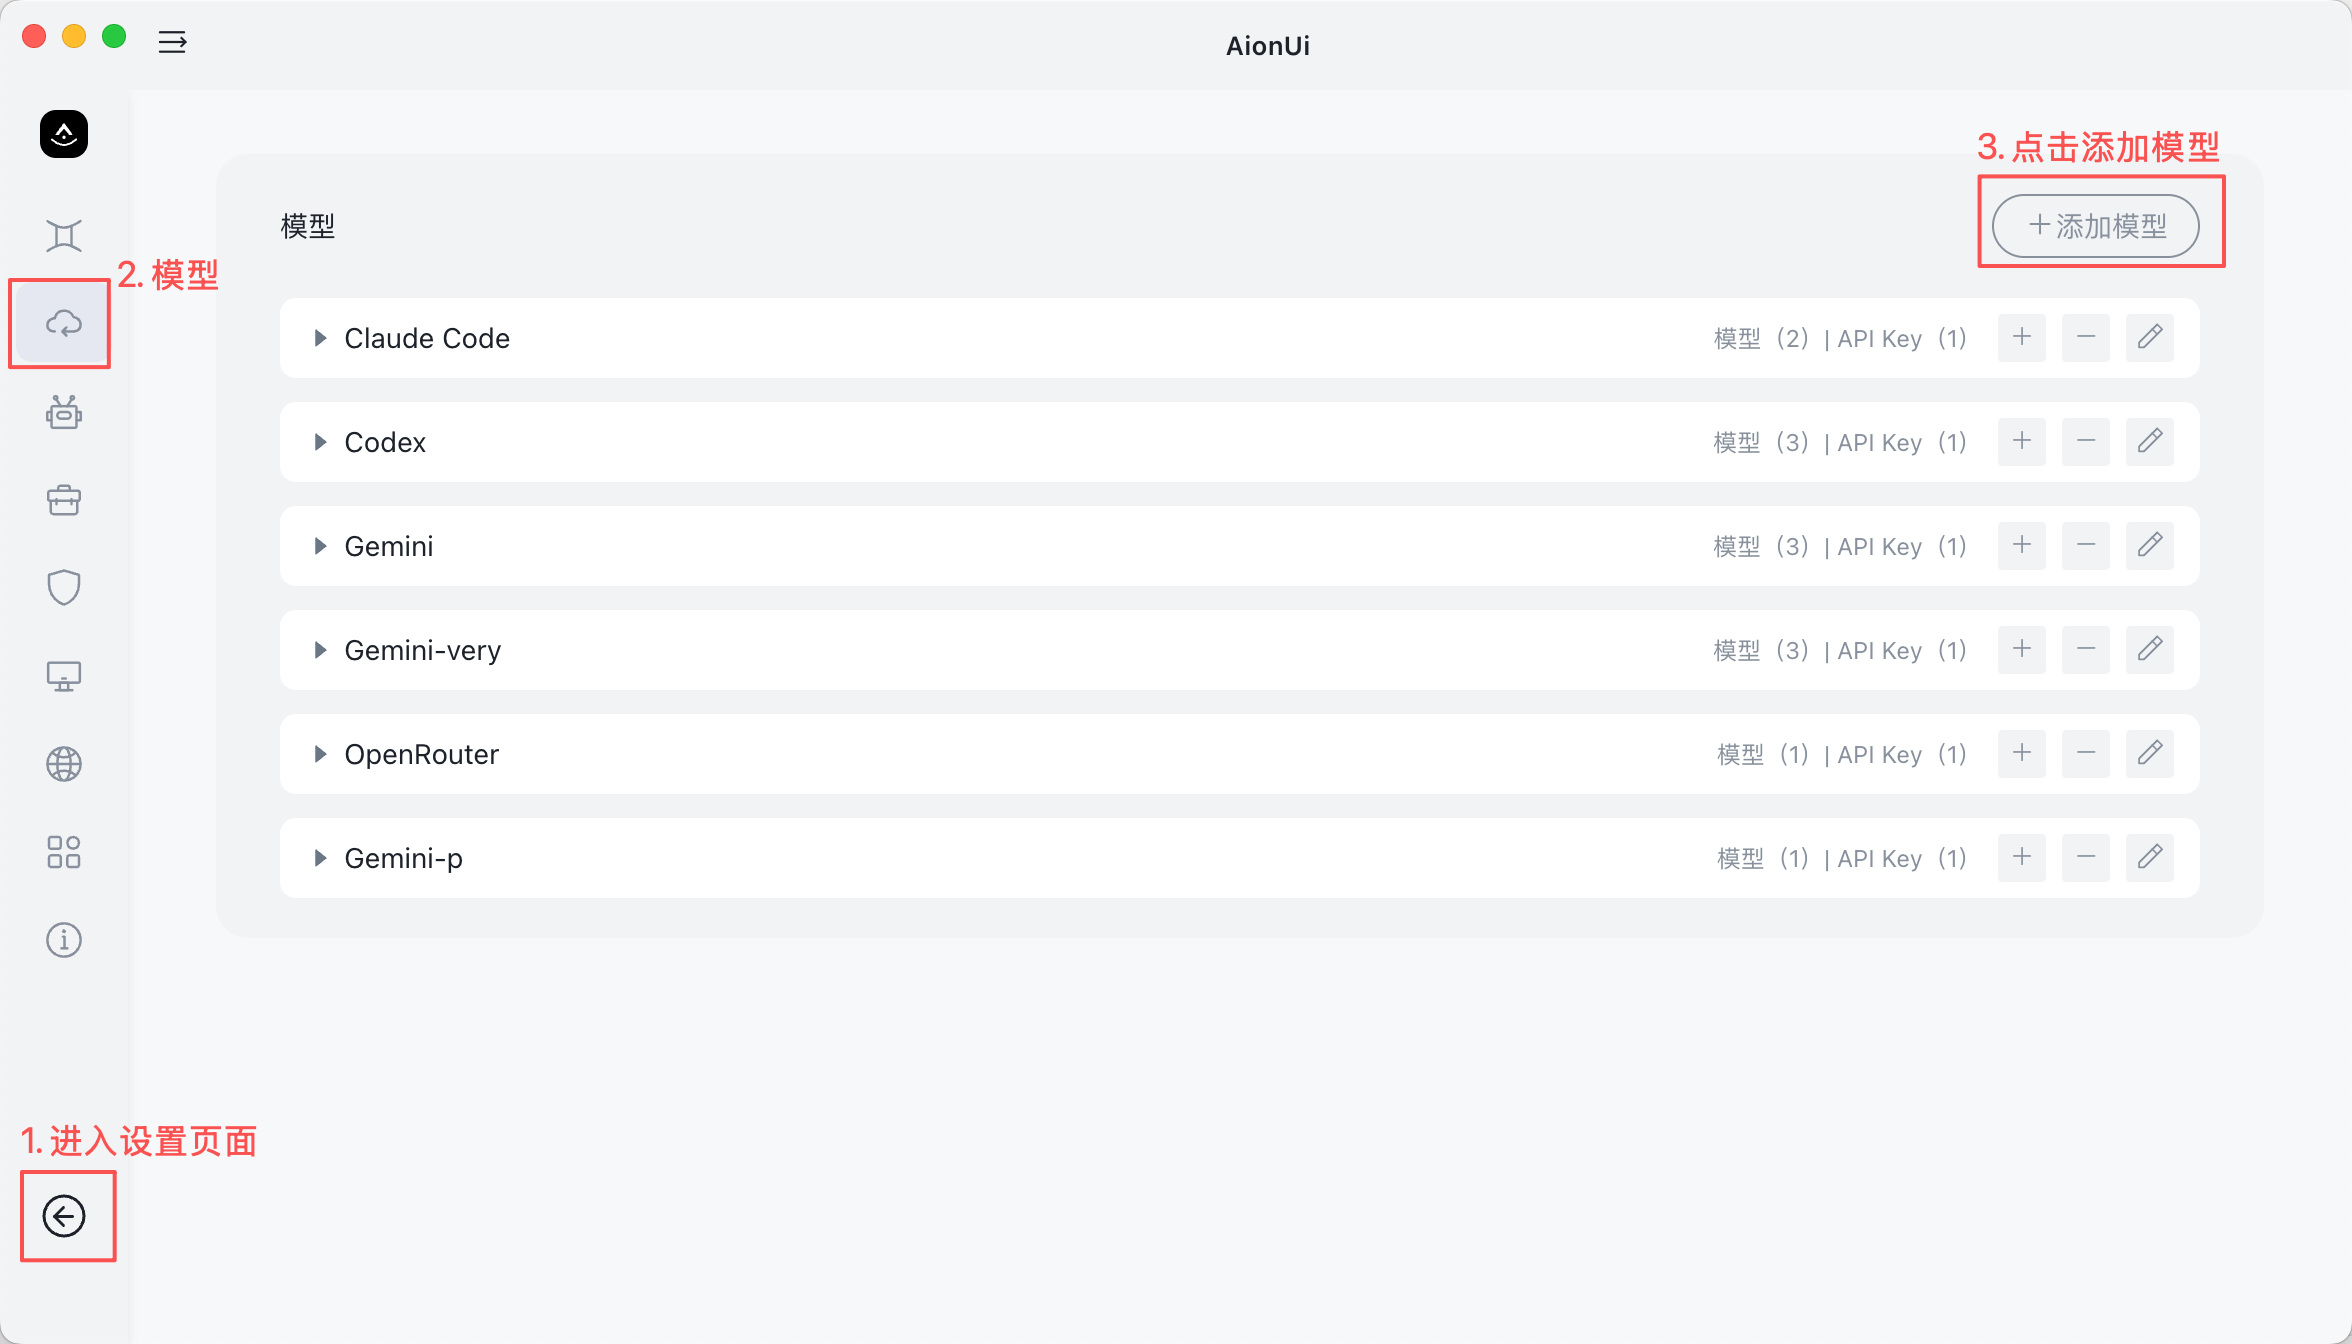
Open AionUi Settings
- Enter the settings page in AionUi
- Find the Model Configuration Tab
- Click "Add Model"
-
Add New Provider
- Click "Add Model"
- Select Nova Router
-
Configure API Information
- API Address: Fill in your Nova Router site address (format:
https://<your-service-domain>/v1) - API Key: Paste the API Key copied from the Nova Router console
- API Address: Fill in your Nova Router site address (format:
-
Add Models
- Select the model to add from the dropdown
- Model name should match the model name configured in Nova Router
- Select the appropriate request protocol
-
Start Using
- Return to the chat page
- Select the configured Nova Router model to start a conversation
How to confirm it worked
- The provider or model appears in the AionUi model list
- You can fetch or manually enter model names successfully
- You can select the model in chat and start a conversation normally
Related Links
How is this guide?